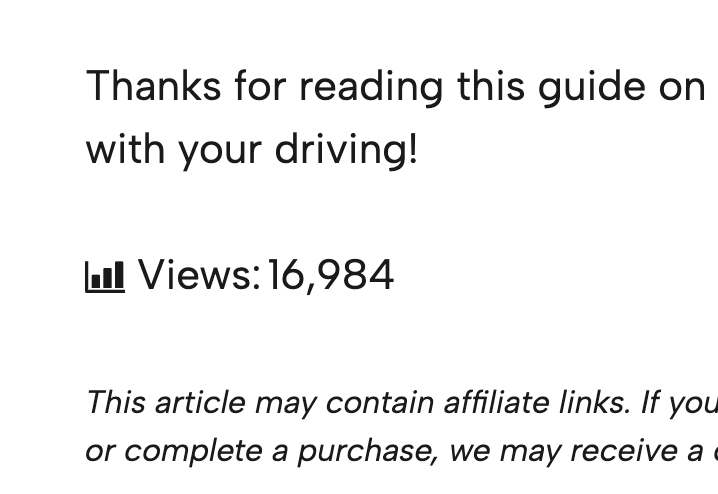
When enabled, the view counter will show up after the content of your posts. It looks like this:
This serves as a form of social proof to let visitors know how many others are reading your content. It can also be helpful if you sell advertising services and want potential clients to see what kind of reach they can expect.
It’s not enabled by default, so the first step is to turn it on.
How to display the view counter
Enabling the view counter is very easy.
Start by visiting the Settings menu and scroll down to the Public View Counter section.
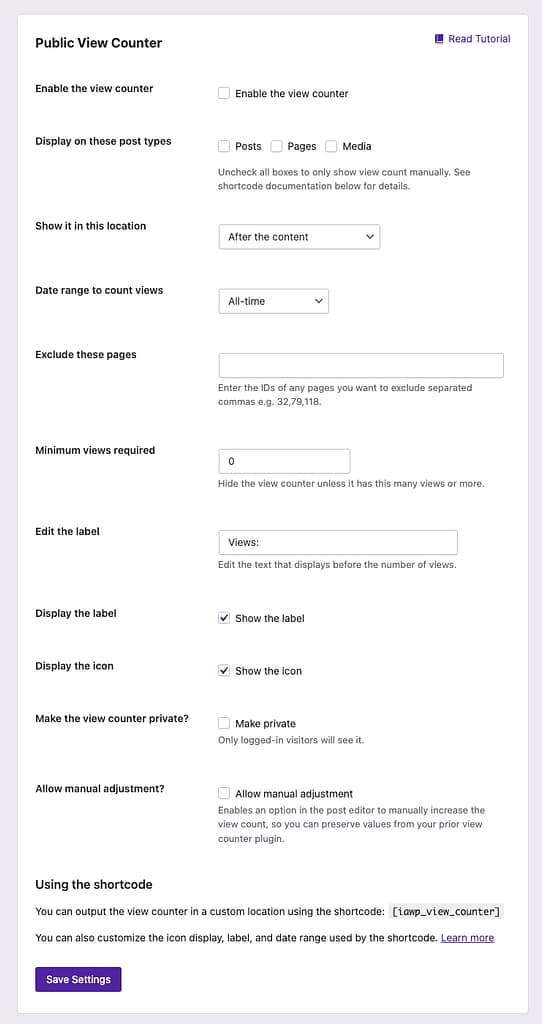
To enable the counter, all you have to do is check the first box and click the Save settings button.
Once this is complete, the view counter will show up after the content of all your posts, styled the same way as pictured in the screenshot at the beginning of this tutorial.
Choose the post type
By default, the view counter only displays on your posts, but you can quickly enable it on any of your page types.

For example, if you check the Pages box, it will show up after the content of every page on your site. If you have any custom post types, they’ll display here as well.
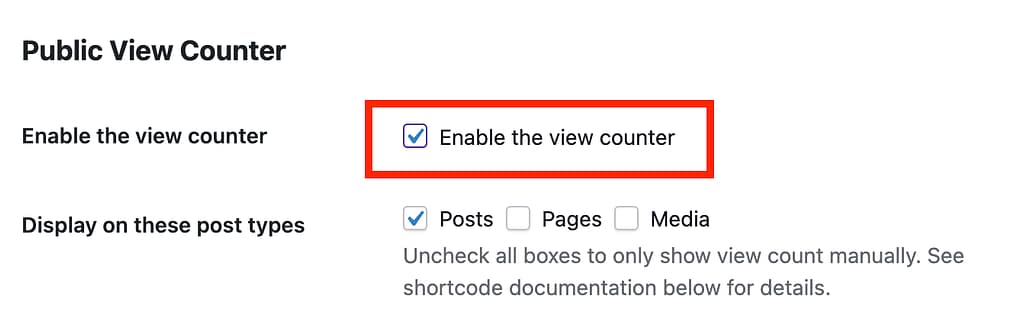
Change the location
The view counter displays after the content, but you can also display it before the content or both before and after.
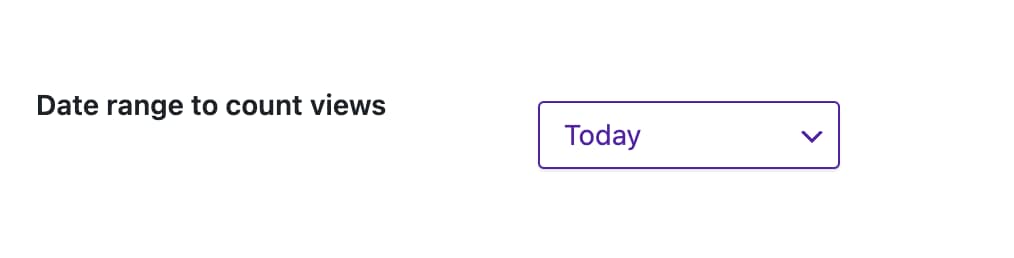
Choose the date range
By default, the view counter shows the total number of views the page has gotten. However, you can limit this to a shorter range so that it will only count views from today, the last 30 days, last month, etc.
Exclude individual pages
You can remove the counter from an individual post/page by entering its ID into this input:

For example, you could show the view counter on all of your pages except for your homepage by enabling the Pages post type and then entering the homepage’s ID here.
You can follow this brief tutorial if you don’t know how to find the ID of a page: how to find a page’s ID.
Set a minimum view count to display the counter
If you have an established site and switch to using Independent Analytics for your view counters, the count will have to begin from 0. You may not want people to see low counts for some of your pages before they have time to get more views.
In this case, you can make use of the Minimum views required setting.

With this option, you can choose the minimum number of views a post needs to have to show the view counter. For instance, let’s say you have a post with only 12 views, and you don’t want the view counter to show up until it has at least 100. You would set the Minimum views required field to “100,” and the view counter would immediately disappear on that post and only reappear once it’s been viewed 100 times.
Edit the label & icon
If you want to change the text that appears before the count (Views:), you can do so via the label input. If you’d prefer not to show the small chart icon, that can be removed by unchecking the Show the icon box. You also have the option to hide the label completely by unchecking the Show the label checkbox.
Make it private
If you only want the view counter to show up for logged-in visitors of the site, you can make it private.

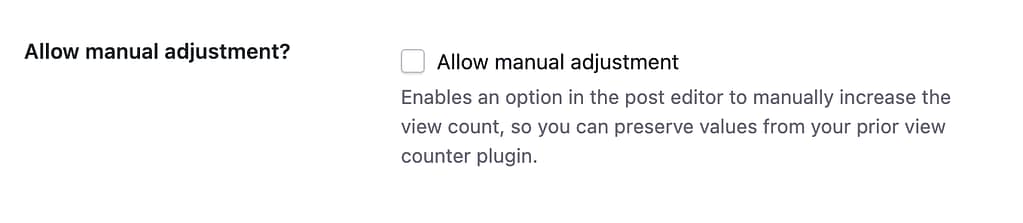
Allow manual adjustment
If you switched from another view counter plugin, you may want to make a manual adjustment to get credit for previous post views. To do that, you can enable this option.
Then, in the post editor, you’ll see this new box where you can enter a manual adjustment.
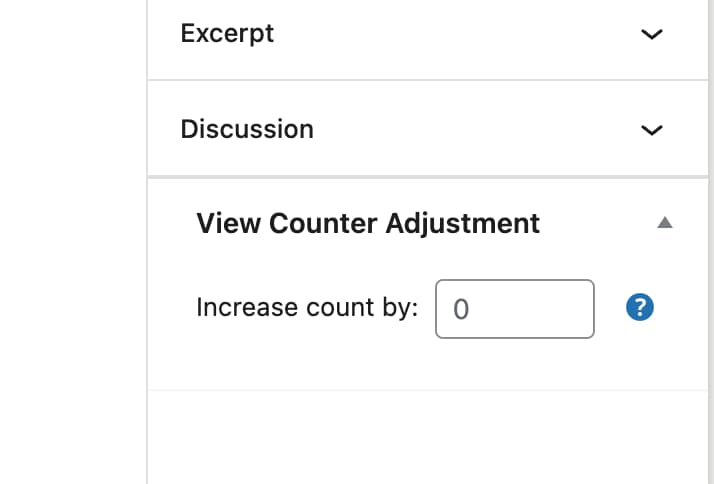
The value entered here will be added to whatever view count is recorded by Independent Analytics.
If you want to modify this value programmatically for a large number of posts, you can use the iawp_view_counter_adjustment post meta field. You would take your current counts and copy them into that field.
Please note that in order for the View Counter Adjustment setting to appear for a post, the view counter needs to be enabled for the Post page type. The same goes for pages and other post types.
How to use the shortcode
There are times when you may want to output the view counter in a custom location.
For instance, you may want to include the view counter in a widget, an Elementor template, or with your post excerpts on archive pages.
This is where the shortcode comes in handy. You can use it to output the counter wherever you want.
Follow this guide if you’ve never used a shortcode before: How to Add Dynamic Content with Shortcodes.
Here is the shortcode without any parameters defined:
[iawp_view_counter]That will output the view counter with the same settings you defined in the Settings menu.
If you want to override the label you defined in the settings, you can do so by including the “label” parameter like this:
[iawp_view_counter label="New label"]Whatever text you enter will be placed before the number of views.
You can override the icon setting by adding the “icon” parameter.
[iawp_view_counter icon="0"]Entering “0” will hide the icon, and “1” will display it.
Lastly, you can add a range to display data from a specific time period rather than all-time:
[iawp_view_counter range="last_thirty"]The supported date ranges are:
- today
- yesterday
- this_week
- last_week
- last_seven
- last_thirty
- last_sixty
- last_ninety
- this_month
- last_month
- last_six_months
- last_twelve_months
- this_year
- last_year
- total (default)
